Private integration used for development and testing with Sonos. This page is provided as a stable home/reference URL for the integration.
All posts by Steve
Setting up Redis Stack on AWS Lightsail using Docker
I’ve been using Bitnami’s redis server on the default NodeJS instance on Lightsail but unfortunately, it’s not the full stack so it’s missing GEO, JSON and full text search support which is a bit of a bummer. So, to solve that problem I decided to see if I could setup Redis Stack using docker on a Lightsail instance. I decided not to use LS container support as I can get an 8GB instance for $40/month, vs. a similar container instance at $100/month.
Redis Stack Cloud on us-west-2 for 5GB of RAM runs $105/month (as of April ’23) without HA.
To start, I created a Debian OS only instance and installed docker:
Install Docker Engine on Debian
Start docker at boot:
$ sudo systemctl enable docker.service
$ sudo systemctl enable containerd.service
And install docker-compose:
$ sudo apt install docker-compose
Next, install both make and gcc to build redis-cli:
Debian Linux Install GNU GCC Compiler
Basically, use this:
$ sudo apt-get update
$ sudo apt-get install build-essential
Next, I wanted just redis-cli installed so here are the steps for building redis-cli:
Install just redis-cli on Ubuntu, Debian
$ cd /tmp
$ wget http://download.redis.io/redis-stable.tar.gz
$ tar xvzf redis-stable.tar.gz
$ cd redis-stable
$ make
$ cp src/redis-cli /usr/local/bin/
$ chmod 755 /usr/local/bin/redis-cli
BUT, I ran into this error running make:
Error jemalloc/jemalloc.h: No such file or directory when making Redis
…and fixed it following the instructions:
$ cd /tmp/redis-stable
$ make distclean
$ make
Next, I copied my docker-compose.yaml (see below) and redis.conf files to the instance at:
~/conf/redis/redis.conf
~/docker-compose.yaml
Here’s my docker-compose.yaml
version: '3'
services:
  redis:
    restart: always
    container_name: redis-stack
    command: redis-server /usr/local/etc/redis/redis.conf
    environment:
      - REDIS_AOF_ENABLED=no
    image: redis/redis-stack-server:latest
    ports:
      - '6379:6379'
    volumes:
      - ./redis-data:/data
      - ./conf/redis/redis.conf:/usr/local/etc/redis/redis.conf
I’m not going to replicate my redis.conf file as it’s too long but I set “requirepass” with the password I’m using which is picked up by redis-server.
For redis-cli you’ll want to set REDISCLI_AUTH variable in /etc/environment:
REDISCLI_AUTH=<password>Next, start docker and run docker-compose:
$ sudo systemctl start docker
$ sudo docker-compose up -d
Test using the CLI:
$ export REDISCLI_AUTH=<password>
$ redis-cli
127.0.0.1:6379> ping
PONG
Update May 8, 2023
I found that the various modules included as part of Redis Stack were not loading due to my overriding redis.conf so I had to add the following to my conf file:
loadmodule /opt/redis-stack/lib/rejson.so
loadmodule /opt/redis-stack/lib/redisgraph.so
loadmodule /opt/redis-stack/lib/redistimeseries.so
loadmodule /opt/redis-stack/lib/redisbloom.so
loadmodule /opt/redis-stack/lib/redisearch.so
Enjoy.
511.org API Rate Limit
I use the 511.org API and one question I see come up frequently on the support forum are requests to increase the number of API requests possible using an API key. The answer is pretty straightforward, the 511 API is not intended to serve as your application’s backend. If you want to serve the data to large numbers of users you’ll need to use your API key, fetch the data, cache it on your own backend and serve it from there. You can then use your API key to refresh your own cached data and serve your application.
Another question that often comes up is access to historic data which, as of this writing, the API simply doesn’t provide. I would doubt the 511.org team will offer historic data anytime soon (if ever). If you’re looking for historic data the answer would be to build your own backend and archive the data.
To request an increased rate limit, you can provide the following information to transitdata@511.org:
- your API key
- the rate limit you need
- a description of the use case
- data endpoints you intend to use
- a brief justification for the requested rate limit
Running Cronicle on an Amazon Lightsail Instance
I was looking for a crontab replacement with a more robust UI and stumbled into Cronicle and decided to give it a try using AWS Lightsail. These steps are really more for my own reference but I figure someone might find them useful. Getting Cronicle on Lightsail is pretty straight forward but I did run into a few things that I didn’t want to have to Google in the future.
Here are the basic steps to get a working instance of Cronicle up and running followed by the actual bash commands:
- Browse to your Lightsail console
- Create a NodeJS instance
- SSH into the new instance
- Create a folder for the app
- Install the bits
- Setup a basic configuration
- Configure an Apache virtual host
$ sudo mkdir /opt/bitnami/apps
$ sudo chown bitnami /opt/bitnami/apps
$ cd apps
$ cd /opt/bitnami/apps
$ mkdir cronicle
$ cd cronicle
$ curl -L https://github.com/jhuckaby/Cronicle/archive/v1.0.0.tar.gz | tar zxvf - --strip-components 1
$ npm install
$ node bin/build.js dist
$ /opt/bitnami/apps/cronicle/bin/control.sh setup
$ ./bin/control.sh start
Then, edit /opt/bitnami/apache/httpd.conf and uncomment proxy_wstunnel module which is needed because Cronicle uses websockets.
$ cd /opt/bitnami/apache/conf
$ sudo vi httpd.conf
# search for proxy_wstunnel and uncomment that line
Next, is to setup an Apache Virtual Host, credit to this SO post for a working configuration:
In /opt/bitnami/apache/conf/vhost simply create a new .conf file and add the following, note 3012 is the default port for Cronicle:
<VirtualHost *:80>
    ServerName www.example.com
    RewriteEngine On
    RewriteCond %{HTTP:Upgrade} =websocket [NC]
    RewriteRule /(.*)           ws://localhost:3012/$1 [P,L]
    RewriteCond %{HTTP:Upgrade} !=websocket [NC]
    RewriteRule /(.*)           http://localhost:3012/$1 [P,L]
</VirtualHost>
Restart Apache:
$ sudo /opt/bitnami/ctlscript.sh restart apache
You should now be able to browse to http://<instance_public_ip> and login.
I followed this up by adding an DNS A record pointing to this IP address and done.
Real world example of Apple’s Emergency SOS messaging service via an iPhone 14
Through website work I’m doing I look at California Highway Patrol data and recently noticed an Apple Emergency SOS alert that was placed and found the content of the messaging interesting and offers some insight into how this system works in a real emergency.
[22:40:00 GMT-08:00 07 JAN 2023] (▪▪▪) ▪▪▪-▪▪▪▪: A USER IS REQUESTING EMERGENCY SERVICES FROM AN APPLE DEVICE VIA SATELLITE. TRANSMIT AND RECEIVE TIMES MAY BE LONGER THAN FOR CELLULAR SMS. USER RESPONSES MAY BE DELAYED DUE TO SATELLITE MOVEMENTS.THE USER CANNOT MAKE OR RECEIVE A VOICE CALL BECAUSE THEY ARE OUTSIDE CELLULAR COVERAGE.AT 06:39AM UTC, M▪▪▪▪▪ F▪▪▪▪ REQUESTED EMERGENCY SERVICES NEAR THESE COORDINATES: LATITUDE 40.7963 (N), LONGITUDE -123.4074 (W).[22:40:00 GMT-08:00 07 JAN 2023] (▪▪▪) ▪▪▪-▪▪▪: RESPONDERS MAY NEED TO SEARCH AN AREA EXTENDING AT LEAST 20 METERS IN ALL DIRECTIONS FOR A 95% CHANCE OF FINDING THE USER.THE USERS ESTIMATED ALTITUDE (HAE) IS 354 METERS. RESPONDERS MAY NEED TO SEARCH 20 METERS ABOVE AND BELOW THIS LEVEL FOR A 95% CHANCE OF FINDING THE USER.THE USER HAS CACHED ENHANCED EMERGENCY DATA WITH APPLE. QUERY ADDITIONAL DATA!THE USERS DEVICE BATTERY STATE IS 61-100%. THEIR VERIFIED PHONE NUMBER IS +1▪▪▪▪▪▪▪▪▪▪.THE USER REQUESTS HELP WITH A FIRE EMERGENCY.[22:40:00 GMT-08:00 07 JAN 2023] (▪▪▪) ▪▪▪-▪▪▪▪: THIS REQUEST IS FOR ME.NO ONE IS ON FIRE.NO ONE IS TRAPPED.THE SPECIFIC EMERGENCY IS A OTHER FIRE. THE USER DESCRIBES THE SPECIFIC EMERGENCY AS FOLLOWS: CAMPER ROLLING SMOKE FIRE THE USERS IPHONE HAS ITS REGION SET TO UNITED STATES. THE USERS IPHONE HAS ITS DEFAULT LANGUAGE SET TO ENGLISH. TCC OR PSAP SYSTEMS MAY GARBLE THIS LANGUAGES SCRIPT. RETURN MESSAGES TO THE USER WILL NOT BE GARBLED. THIS CONCLUDES THE INITIAL DATA. TWO-WAY TEXT WITH THE USER IS NOW AVAILABLE.[22:41:00 GMT-08:00 07 JAN 2023] K▪▪▪ M▪▪▪▪▪▪ HAS ENTERED THE CHAT[22:41:00 GMT-08:00 07 JAN 2023] K▪▪▪ M▪▪▪▪▪▪: WHAT IS ON FIRE CALL INITIATED: 22:39:59 GMT-08:00 07 JAN 2023 PHONE NUMBER: (▪▪▪) ▪▪▪-▪▪▪▪Setting Up Google Analytics alternative Plausible.io on Amazon Lightsail
With the imminent demise of Google Analytics Universal in July 2023 I’ve been searching for an alternative and found an Open Source project from Plausible.io. Slight warning, this post is largely for myself to remember what I did to get this going so YMMV.
I host a few sites on Amazon Lightsail and while I found a few great posts discussing self-hosting of Plausible I found these setups perhaps a bit more complicated that I think it needed to be. For example, Lightsail has instances that include both a web server and Bitnami’s Let’s Encrypt SSL tool already installed so starting from an OS-only instance type requires some unnecessary configuration.
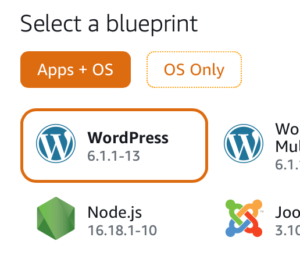
To get started quickly browse to the Amazon Lightsail console and under Apps + OS select the NodeJS instance using Debian (as of this writing Feb 2023). You could use and “OS Only” option but then you’d be left installing a number of packages vs. using this pre-built instance.
You’ll want to setup a static IP address for this instance for your DNS entry (see below). Next, SSH into your instance and create an “apps” folder under /opt/bitnami:
$ cd /opt/bitnami
$ sudo mkdir apps
$ cd apps
Clone the Plausible repo and setup the configuration as per the great Plausible self-hosting guide:
$ sudo git clone https://github.com/plausible/hosting plausible
$ cd plausible
# Generate SECRET_KEY_BASE value using openssl
$ openssl rand 64 | base64 -w 0 ; echo
$ sudo vi plausible-conf.env
# Edit the plausible config file and add config values
Install a missing gpg package:
$ sudo apt update -y
$ sudo apt-get install gpg
$ sudo curl -fsSL https://download.docker.com/linux/ubuntu/gpg | sudo gpg --dearmor -o /usr/share/keyrings/docker-archive-keyring.gpg
$ echo "deb [arch=amd64 signed-by=/usr/share/keyrings/docker-archive-keyring.gpg] https://download.docker.com/linux/ubuntu focal stable" | sudo tee /etc/apt/sources.list.d/docker.list > /dev/null
$ sudo apt-get update
$ sudo apt-get install docker-ce docker-ce-cli docker-compose containerd.io -y
There are only a few config values you need to launch your instance and start tracking your site’s analytics:
ADMIN_USER_EMAIL=
ADMIN_USER_NAME=
ADMIN_USER_PWD=
BASE_URL=
SECRET_KEY_BASE=
NOTE: I added DISABLE_REGISTRATION as I’m the only user who needs access.
I use Cloudflare for my CDN/DNS and I created an A NAME DNS-only entry pointing to analytics.<domain>.com which I use for Plausible.
Next, again following the self-hosting guide I started up the server using docker-compose:
$ sudo docker-compose up -d
The docs weren’t super clear about getting the first user created but browse to your URL and register the first user directly on the site. Following that I would recommend disabling registrations in the plausible-conf.env using:
DISABLE_REGISTRATION=trueNext, run Bitnami’s bncert-tool and setup a Let’s Encrypt SSL cert for your server once you’ve made a donation.
Finally, setup your Apache virtual host config by copying the existing sample HTTPS configuration:
$ cd /opt/bitnami/apache/conf/vhosts
$ sudo cp sample-https-vhost.conf.disabled plausible-https-vhost.conf
Here’s my Apache vhost file for Plausible (using X-Robots-Tag to prevent crawling):
<VirtualHost 127.0.0.1:443 _default_:443>
  ServerName analytics.<domain>.com
  ServerAlias *
  SSLEngine on
  Header Set X-Robots-Tag "noindex, noarchive, nosnippet"
  SSLCertificateFile "/opt/bitnami/apache/conf/analytics.<domain>.com.crt"
  SSLCertificateKeyFile "/opt/bitnami/apache/conf/analytics.<domain>.com.key"
  DocumentRoot /opt/bitnami/apps/plausible
  # BEGIN: Configuration for letsencrypt
  Include "/opt/bitnami/apps/letsencrypt/conf/httpd-prefix.conf"
  # END: Configuration for letsencrypt
  # BEGIN: Support domain renewal when using mod_proxy without Location
  <IfModule mod_proxy.c>
    ProxyPass /.well-known !
  </IfModule>
  # END: Support domain renewal when using mod_proxy without Location
  <Directory "/opt/bitnami/apps/plausible">
    Options -Indexes +FollowSymLinks -MultiViews
    AllowOverride All
    Require all granted
  </Directory>
  ProxyPass / http://localhost:8000/
  ProxyPassReverse / http://localhost:8000/
  # BEGIN: Support domain renewal when using mod_proxy within Location
  <Location /.well-known>
    <IfModule mod_proxy.c>
      ProxyPass !
    </IfModule>
  </Location>
  # END: Support domain renewal when using mod_proxy within Location
</VirtualHost>
Following this suggestion, in /opt/bitnami/apps/plausible I created a robots.txt file with the following. Note, need to allow /js/ to allow crawling to work correctly for pages using Plausible:
User-agent: *
Allow: /js/
Disallow: /
I then updated the docker-compose.yaml adding a volumes mapping to this local file under the plausible service.
Lastly, restarted both Plausible and Apache and you should be well on your way to getting your Google Analytics alternative running.
$ sudo docker-compose down --remove-orphans && sudo docker-compose up -d
$ sudo /opt/bitnami/ctlscript.sh restart apache
All in all, the above took me less than a hour to get a working instance of Plausible.io up and running, self-hosted for $20/month on a 4GB Lightsail instance.
So far, I’ve been running this instance for 6 days and it looks pretty good. I’m getting a 500 error trying to import my old GA data so not quite sure what’s going on there but I did manage to get Google Search Console enabled but I’m not see where that data might show up. I’ve also setup email reporting and I’m curious to see what those look like.
Lastly, this project lives on its paid subscriptions to its cloud hosted version and assuming it works out I’ll be sure to use their sponsorship page.
MASSDOT API Authentication
I’ve worked with a lot of DOT type data and I have to say Massachusetts takes the cake for a seemingly unnecessarily complicated authentication process. The processes is documented on their /auth-token API.
This endpoint is available to all authorized users. The content of the response is the same for all user groups. The Bearer signature generation that uses this token is performed as follows.
MADOT
Ok, here is the six, yes six step process to authenticate MASSDOT APIs:
Step 1: Concatenate the user’s secret key with the token provided herein, separated by a colon. (‘SecretKey:token’)
Step 2: Create a SHA256 hash of the concatenated string. (i.e. SHA256(secretKey:token))
Step 3: Convert the generated hash to a hexadecimal string representation
Step 4: Concatenate the user’s username with the hexadecimal hash, separated by a colon. (‘username:hexadecimalHash’)
Step 5: Create the base-64 string representation of the concatenation. (Base64(‘username:hexadecimalHash’))
Step 6: The result is the signature required for Bearer type authorization. (Authorization Bearer ‘generated signature’)
Btw, I provided this gist to MASSDOT in the event they want to link/share for other developers.
Working with Apollo CLI
I’ve been exploring the Apollo stack for developing with GraphQL and find the documentation a bit outdated so I decided to make some notes for myself and start collecting them here. The first thing I wanted to do is experiment with the apollo client codegen for TypeScript and understand how this tool works and leverage it for creating a TypeScript Apollo client. I started by using this Starwars sample Apollo server so I could focus on the client-side code gen which was quick and easy to stand up.
$ git clone https://github.com/apollographql/starwars-server.git
...
$ cd starwars-server
$ yarn && yarn start
yarn run v1.15.2
$ nodemon ./server.js --exec babel-node
[nodemon] 1.19.0
[nodemon] to restart at any time, enter `rs`
[nodemon] watching: *.*
[nodemon] starting `babel-node ./server.js`
🚀 Server ready at http://localhost:8080/graphql
🚀 Subscriptions ready at ws://localhost:8080/websocket
Next, I tested a simple GraphQL query to make sure the server is working by browsing here:
http://localhost:8080/graphql
I installed the Apollo CLI and started experimenting with codegen. Unfortunately, as of this writing the CLI documentation is outdated and refers to apollo-codegen and the parameters and configuration appear to have changed. To play with newer apollo CLI and client-side codegen I created a new “project” folder and just wanted to get some code generated without any other project dependencies/files etc. So, I created a folder to get started:
$ mkdir starwars-client
$ cd starwars-client
Next, I ran the apollo CLI to download the server’s schema with –endpoint parameter pointing to the running instance of the starwars-server sample:
$ ➜  starwars-client apollo client:download-schema --endpoint=http://localhost:8080/graphql
⚠️  It looks like there are 0 files associated with this Apollo Project. This may be because you don't have any files yet, or your includes/excludes fields are configured incorrectly, and Apollo can't find your files. For help configuring Apollo projects, see this guide: https://bit.ly/2ByILPj
  ✔ Loading Apollo Project
  ✔ Saving schema to schema.json
$ ls
schema.json
$
As you can see, this created a schema.json file containing details from my starwars-server. The next step is generating TypeScript code for a single GraphQL query using the downloaded schema. For good measure I’ll include a few of the issues I ran into along the way as I didn’t fine a lot on Google related to the various error messages.
➜  starwars-client apollo client:codegen
 ›   Error: Missing required flag:
 ›     --target TARGET  Type of code generator to use (swift | typescript | flow | scala)
 ›   See more help with --help
Ok, so I’m missing –target, that’s easy enough to add…
➜  starwars-client apollo client:codegen --target typescript
Error: No schema provider was created, because the project type was unable to be resolved from your config. Please add either a client or service config. For more information, please refer to https://bit.ly/2ByILPj
    at Object.schemaProviderFromConfig (~/.nvm/versions/node/v10.15.3/lib/node_modules/apollo/node_modules/apollo-language-server/lib/providers/schema/index.js:29:11)
    at new GraphQLProject (~/.nvm/versions/node/v10.15.3/lib/node_modules/apollo/node_modules/apollo-language-server/lib/project/base.js:31:40)
    at new GraphQLClientProject (~/.nvm/versions/node/v10.15.3/lib/node_modules/apollo/node_modules/apollo-language-server/lib/project/client.js:33:9)
    at Generate.createService (~/.nvm/versions/node/v10.15.3/lib/node_modules/apollo/lib/Command.js:114:28)
    at Generate.init (~/.nvm/versions/node/v10.15.3/lib/node_modules/apollo/lib/Command.js:37:14)
➜  starwars-client
Again, unfortunately the bitly short link provided by the tool points back to the outdated apollo-codegen documentation which is inaccurate. So I added –localSchemaFile pointing to my newly downloaded schema.json:
➜  starwars-client apollo client:codegen --localSchemaFile=schema.json --target=typescript
⚠️  It looks like there are 0 files associated with this Apollo Project. This may be because you don't have any files yet, or your includes/excludes fields are configured incorrectly, and Apollo can't find your files. For help configuring Apollo projects, see this guide: https://bit.ly/2ByILPj
  ✔ Loading Apollo Project
  ✖ Generating query files with 'typescript' target
    → No operations or fragments found to generate code for.
Error: No operations or fragments found to generate code for.
    at write (~/.nvm/versions/node/v10.15.3/lib/node_modules/apollo/lib/commands/client/codegen.js:61:39)
    at Task.task (~/.nvm/versions/node/v10.15.3/lib/node_modules/apollo/lib/commands/client/codegen.js:86:46)
➜  starwars-client
What this error is actually saying is that the tool is expecting to find either .graphql or .ts files that have GraphQL “operations” aka queries, or mutations defined within my project folder which I haven’t created yet. Turns out there are a few options, 1) create .ts files with gql constants or 2) create a .graphql file(s) that contain named queries. I started with a simple query.graphql file for testing like this:
query {
  heros(episode: NEWHOPE) {
    name
  }
}
I then ran the command again:
➜ starwars-client apollo client:codegen --localSchemaFile=schema.json --target=typescript
…and this yielded the same error as above because the CLI defaults to looking in ./src although you can change this using the –includes parameter. So I created the folder, moved the query.graphql file and re-ran the tool:
➜  starwars-client apollo client:codegen --localSchemaFile=schema.json --target=typescript
  ✔ Loading Apollo Project
  ✖ Generating query files with 'typescript' target
    → Apollo does not support anonymous operations
GraphQLError: Apollo does not support anonymous operations
Basically, this is telling me didn’t “name” the query so back to editing the query.graphql file and adding “heros”:
query heros {
  hero(episode: NEWHOPE) {
    name
  }
}
Ok, now let’s try that again:
➜  starwars-client apollo client:codegen --localSchemaFile=schema.json --target=typescript
  ✔ Loading Apollo Project
  ✔ Generating query files with 'typescript' target - wrote 2 files
Success! I now have a few new folders and files added to my “project”:
➜  starwars-client tree
.
|____schema.json
|______generated__
| |____globalTypes.ts
|____src
| |____query.graphql
| |______generated__
| | |____heros.ts
Btw, here’s an example .ts file with a gql constant declared that would also work to generate code:
const heros = gql`
query heros {
  hero(episode: NEWHOPE) {
    name
  }
}`;
In the above example I use command-line options although the apollo CLI supports a config file which looks like the following located in apollo.config.js which points to a remote schema from my starwars-server instance:
module.exports = {
    client: {
        service: {
            url: "http://localhost:8080/graphql"
        }
    }
}
Using the config file you can change the command-line as follows for pulling the schema:
➜  starwars-client apollo client:download-schema --config=apollo.client.js
  ✔ Loading Apollo Project
  ✔ Saving schema to schema.json
Next, I’ll start making use of the generated code and save that for another post.
Accessing VMware vcenter REST API Authentication from curl
Here’s a simple example of calling the vSphere REST API using curl. These commands first authenticate to the API which creates a vmware-api-session-id cookie which is stored to cookie-jar.txt then makes a request to get a list of VMs:
<br>
curl -k -i -u administrator@vsphere.local:password -X POST -c cookie-jar.txt https://vcenter/rest/com/vmware/cis/session<br>
curl -k -i -b cookie-jar.txt https://vcenter/rest/vcenter/vm<br>
NOTE: Use with caution as your credentials will likely be caught in your command line history!
Here’s a related post on vSphere SDKs.
Check out the new VMware developer.vmware.com portal!
Debugging a Python Scrapy Project in VSCode
I’ve been working on a small web scraping project using Scrapy in Visual Studio Code using the Python Extension. I’m using a virtualenv with Scrapy installed and my launch.json file looks like this:
Continue reading Debugging a Python Scrapy Project in VSCode